Intro #
Cisco Modeling Labs is a platform used to run virtual network devices provided by Cisco. CML can be installed on a bare-metal server or deployed as a Virtual Machine on the hypervisor.
![]()
Today I want to show you that it’s possible to deploy CML on a Proxmox hypervisor even though it is not supported platform to run CML on (you can read about system requirements here)
I’ve been a huge fan of the free ESXI hypervisor, but unfortunately, I’ve been prevented from downloading ESXI image from the VMware website. After the VMware acquisition done by Broadcom, free ESXI has been removed from the General Availability program, so you cannot download it anymore.
I took advantage of a Pi Day Sale and got my CML Personal license for 25% off. I had no idea if CML would work on a Proxmox, so that was a bit risky for me.
This article is focused on setting up the VM itself on a Proxmox, rather than setting up the CML itself Installation process is well described and you can find it on a Cisco docs
Installation #
Prerequisites #
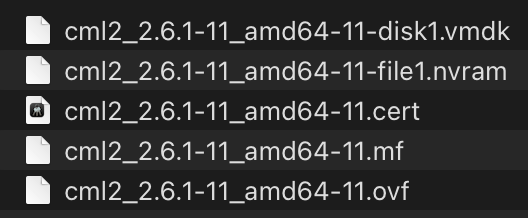
To deploy CML, you need two files - CML Controller OVA and reference platform (refplat) ISO - iso file containing device images. Both files can be downloaded from the Software Center.
Once files are downloaded, extract ova files on your computer to get vmdk file.
Upload our vmdk file to the Proxmox server. The easiest way is to use scp command on a macOS or Linux, but on your Windows PC, you can use another tool like WinSCP.
Once the file is copied to the Proxmox host, convert vmdk file to qcow2 format using the command below executed on a proxmox server:
qemu-img convert -f <source vmdk file> -O qcow2 <destination qcow2 filename>
root@proxmox:~# qemu-img convert -f vmdk cml2_2.6.1-11_amd64-11-disk1.vmdk -O qcow2 cml2-disk.qcow2
root@proxmox:~# ls -l
total 46484472
-rw-r--r-- 1 root root 902876672 Mar 14 16:38 cml2_2.6.1-11_amd64-11-disk1.vmdk
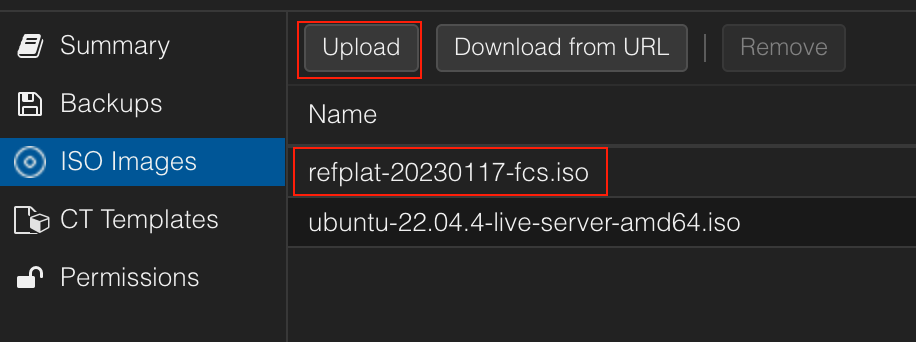
-rw-r--r-- 1 root root 2419130368 Mar 14 16:40 cml2-disk.qcow2Upload refplat iso file to Proxmox ISO storage so you can use it later.
Creating VM machine #
It’s time to create a Virtual Machine in a GUI. The process is really simple, so I’ll skip describing it in detail, except for key options that need to be set to have CML working.
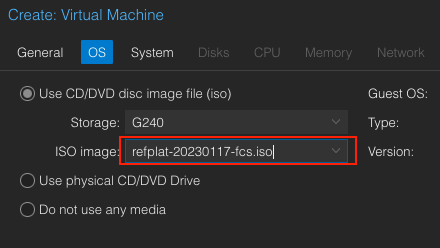
OS
Mount the repflat ISO file that you uploaded in the previous steps.
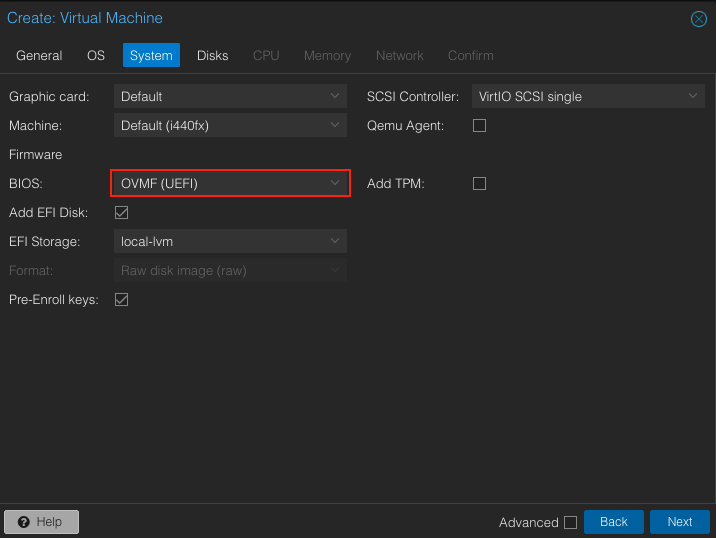
SYSTEM
Set your BIOS type to OVMF (UEFI) otherwise, your VM won’t boot from the attached qcow2 disk!
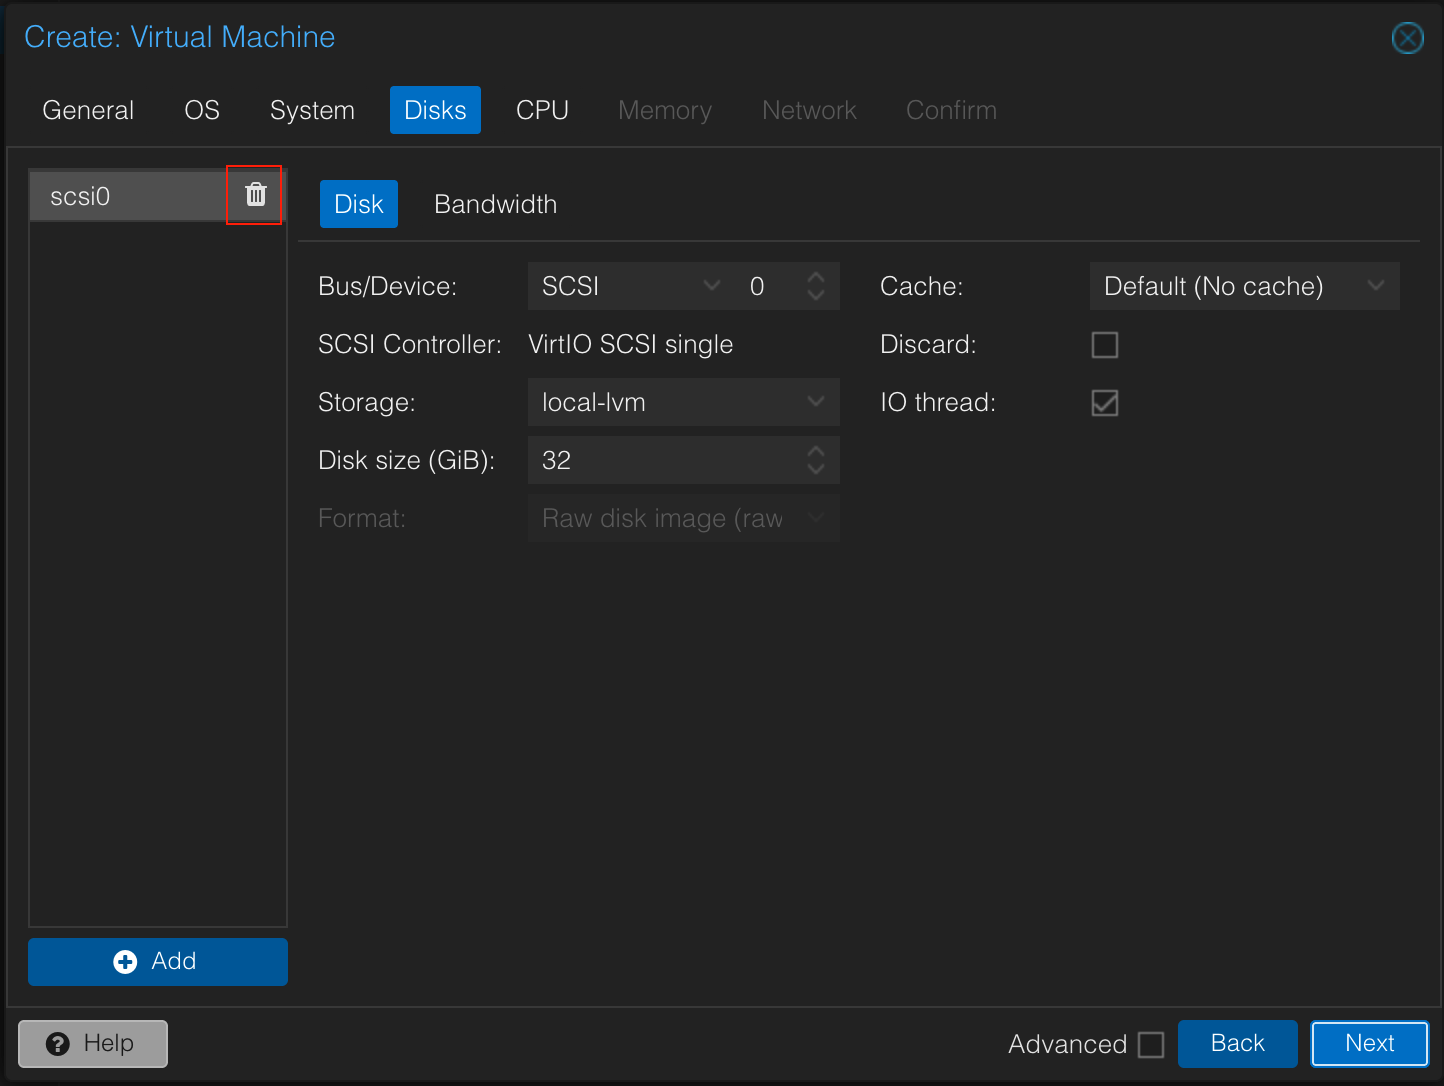
DISK
On a disk tab - remove the default “scsi0” disk - you don’t need to consume extra disk space for this since you will import the disk downloaded in a previous step.
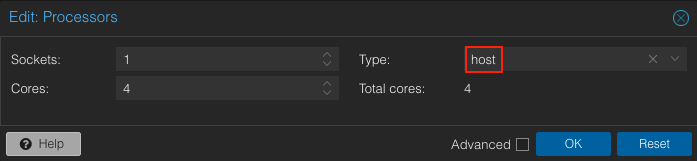
CPU
Make sure you set your processor type to “host”.
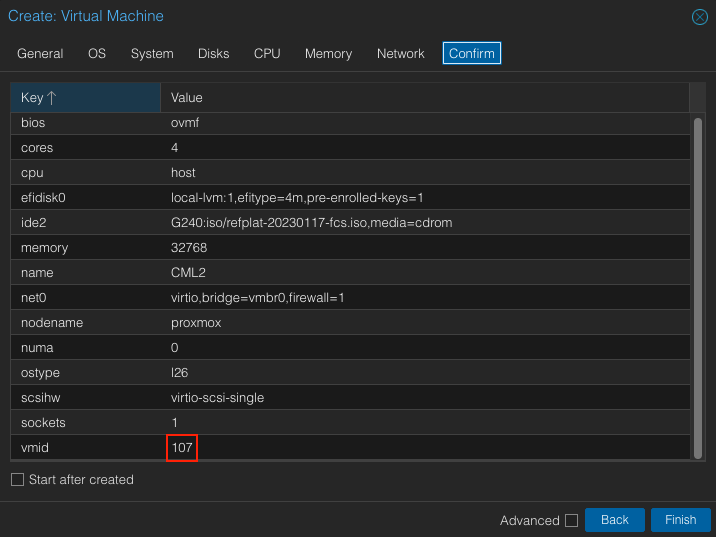
CONFIRM
Make sure you’ve noted down the ID of a VM. You’ll use it later. If you accidentally skipped this step, you can see the ID of your VM on a summary page or it can be listed using qm list in a Proxmox shell.
Importing qcow2 disk to VM #
In the prerequisites, you converted vmdk file to qcow2 format and then you uploaded it to your Proxmox server. Now it’s time to assign it to the newly created VM.
Log in to your Proxmox server then navigate to the directory with your qcow2 disk.
Execute command: qm importdisk <vm_id> <disk_name> <storage name> --format raw
In my case command looked like below:
root@proxmox:~# qm importdisk 107 cml2-disk.qcow2 local-lvm --format raw
importing disk 'cml2-disk.qcow2' to VM 107 ...
  Logical volume "vm-107-disk-1" created.
transferred 0.0 B of 32.0 GiB (0.00%)
transferred 331.0 MiB of 32.0 GiB (1.01%)
transferred 668.5 MiB of 32.0 GiB (2.04%)
transferred 1006.0 MiB of 32.0 GiB (3.07%)
transferred 1.3 GiB of 32.0 GiB (4.10%)
<output ommited>
transferred 32.0 GiB of 32.0 GiB (100.00%)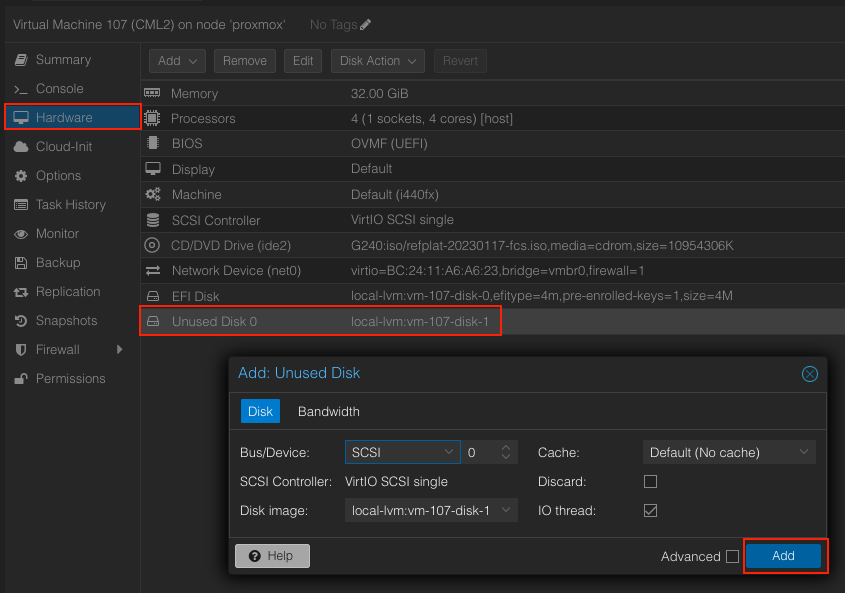
Successfully imported disk as 'unused0:local-lvm:vm-107-disk-1'When the process is finished, go back to your VM settings and assign the imported disk to your VM.
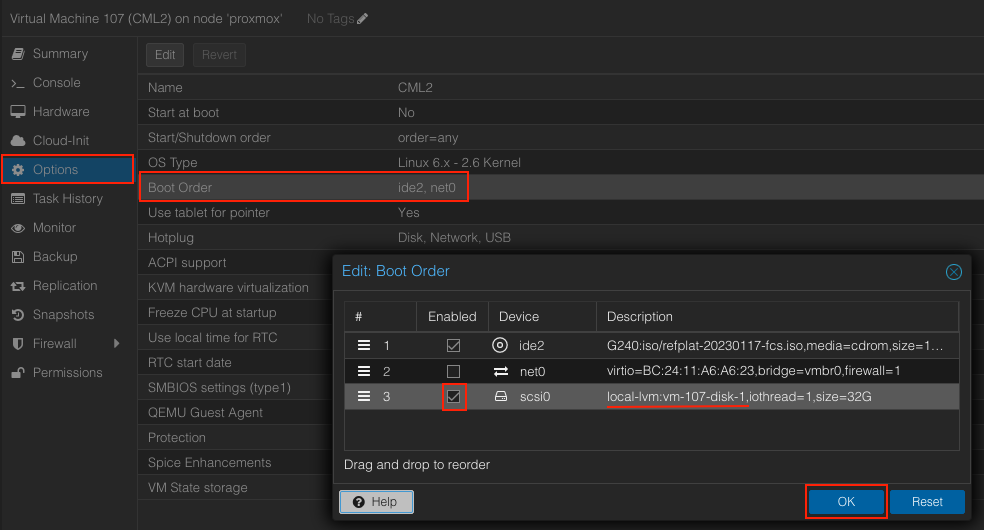
The last step is to change the boot order so your VM will first boot from ISO file, then from already imported disk.
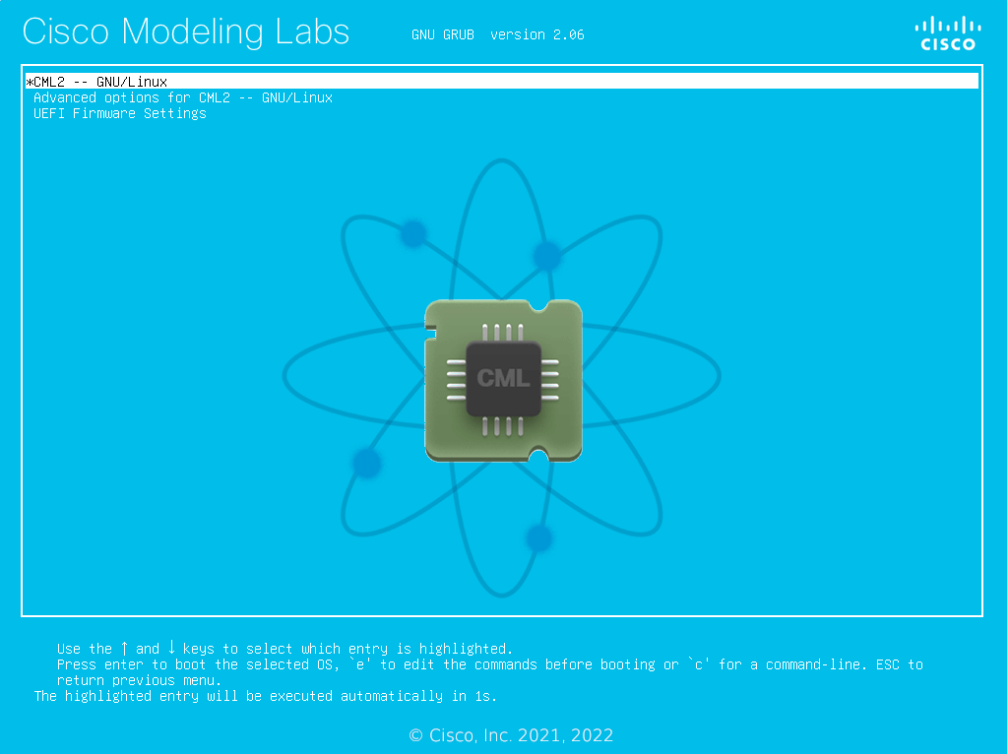
When everything is set properly, and the machine is powered on - on a console you should see the following:
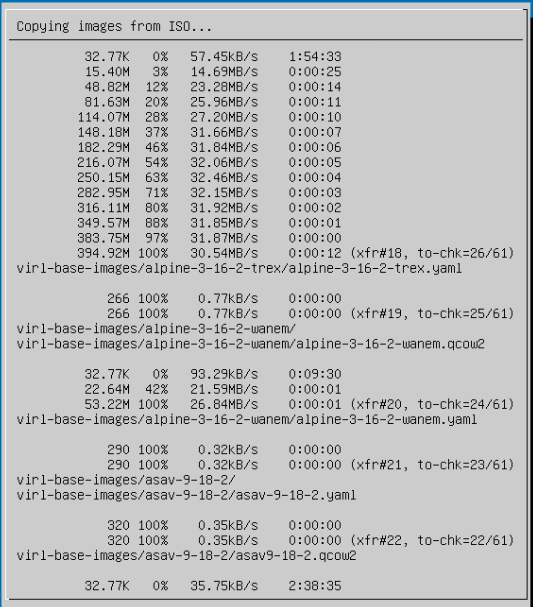
Now you are ready to set up your CML instance. Follow the setup utility to set up the hostname, IP Address, and other basic stuff.
Once done, the setup utility will copy images to the disk. That’s why we mounted ISO file to the VM.
Post-installation steps #
Expanding disk space #
Imported disk has a size of 32GB by default. That might be too few for you so you might want to extend this.
To extend the disk, execute the following command:
qm resize <vm_id> <disk> <size>
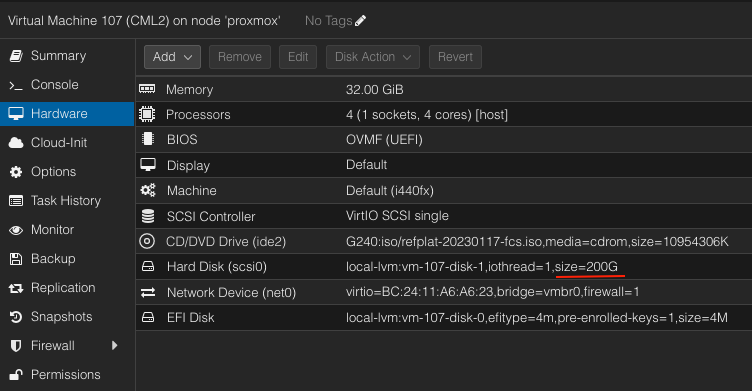
In my case - I wanted to have a disk size of 200G, so I added 168GB to the existing value of 32GB.
root@proxmox:~# qm resize 107 scsi0 +168G
  Size of logical volume pve/vm-107-disk-1 changed from 32.00 GiB (8192 extents) to 200.00 GiB (51200 extents).
  Logical volume pve/vm-107-disk-1 successfully resized.
root@proxmox:~#
In a VM’s hardware settings confirm that disk has been expanded.
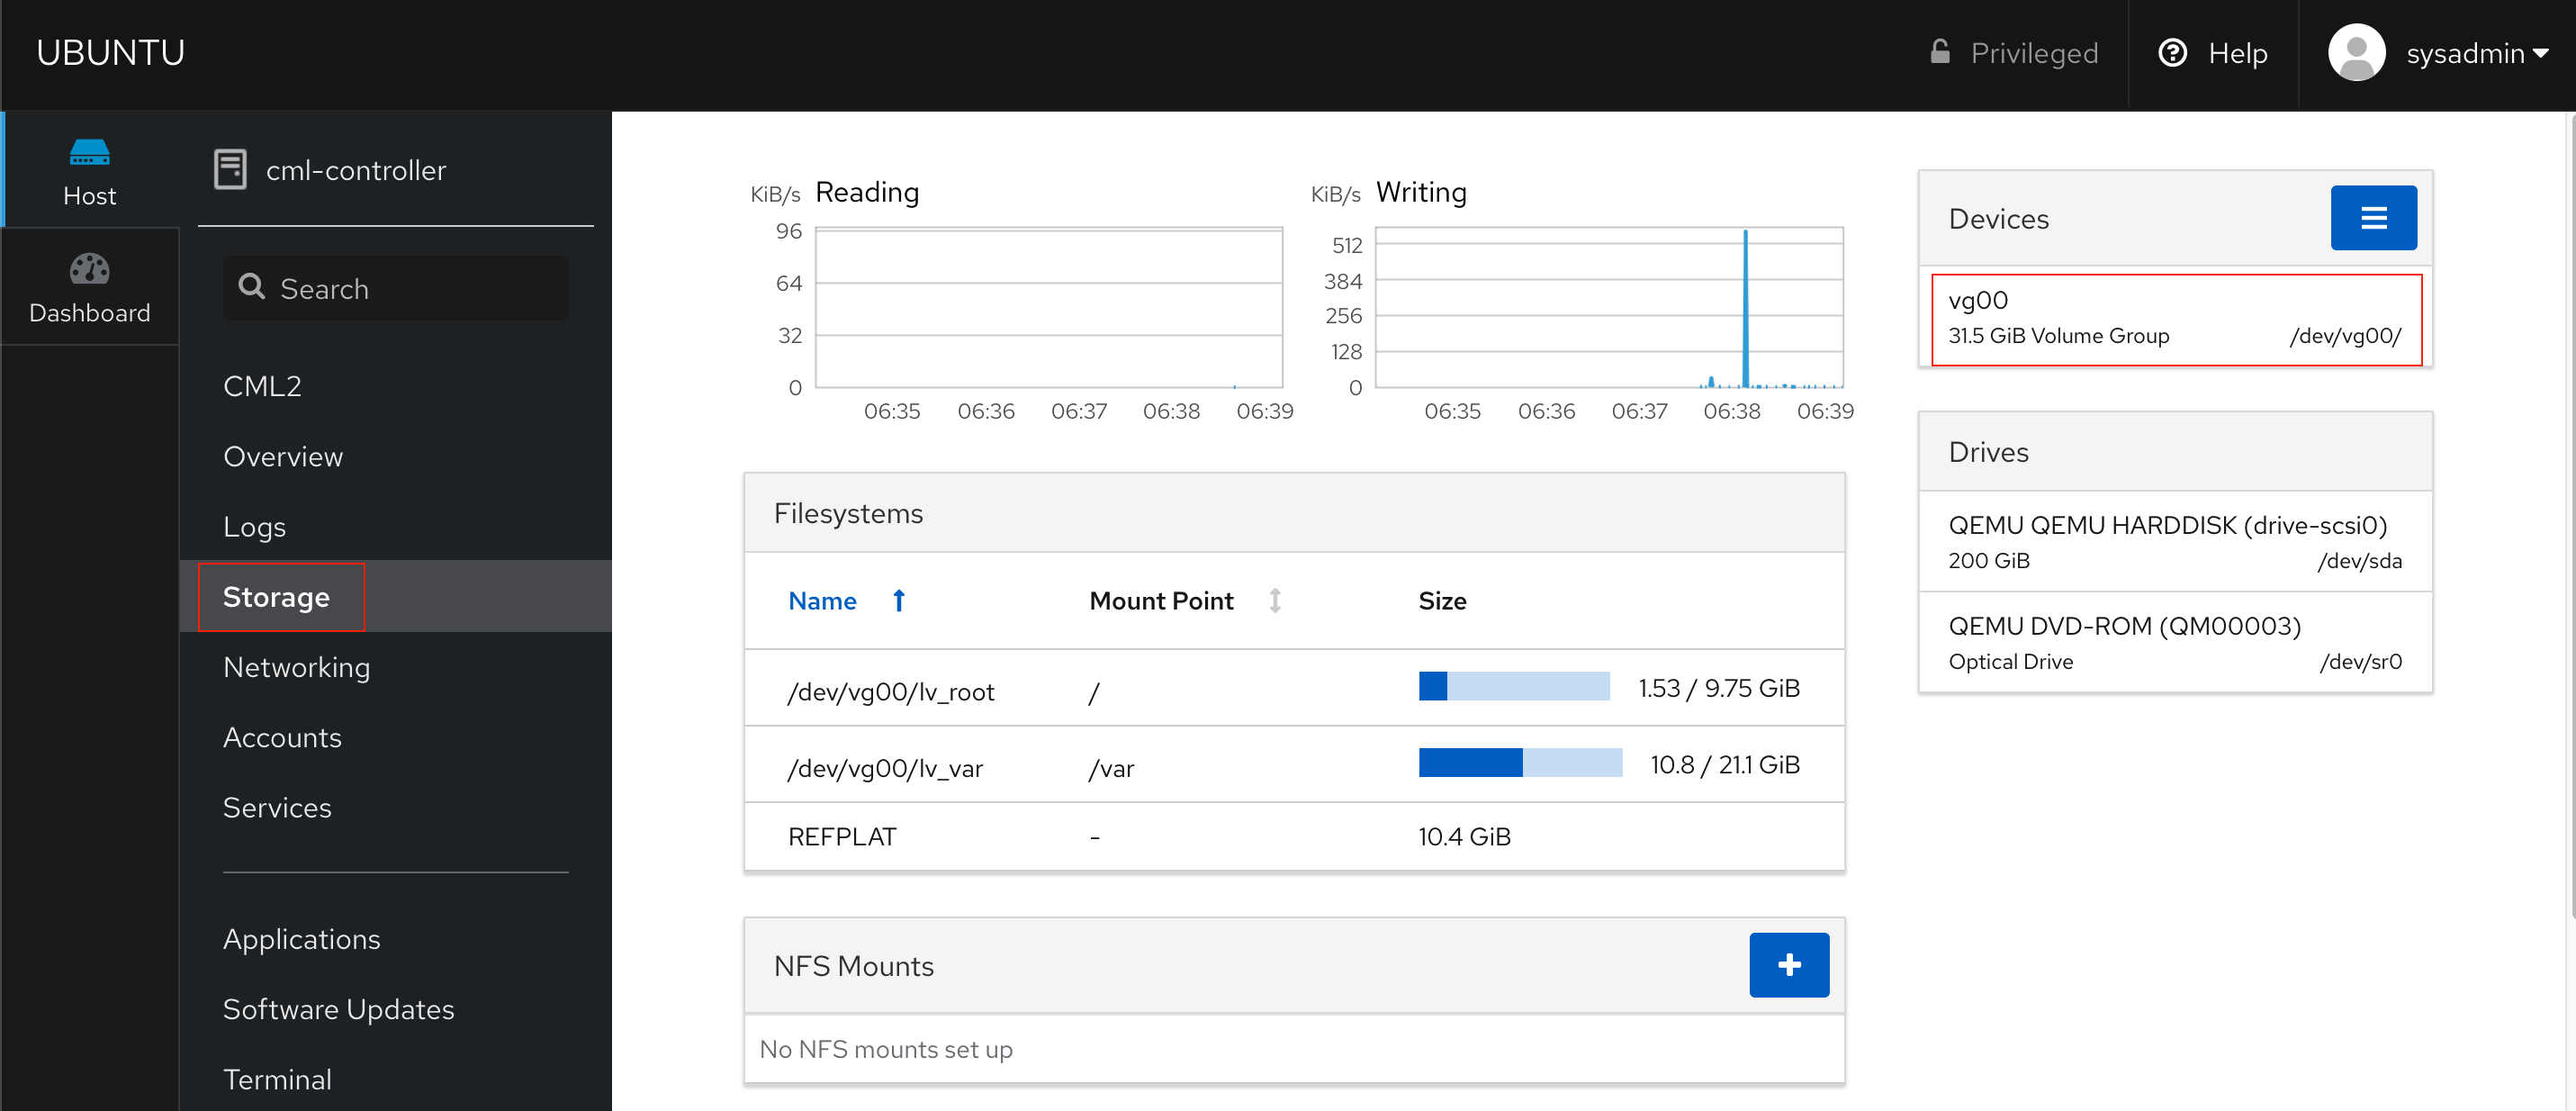
Log in to the maintenance website under https://<CML IP address>:9090/ then navigate to Storage tab and click on vg00 device on the right.
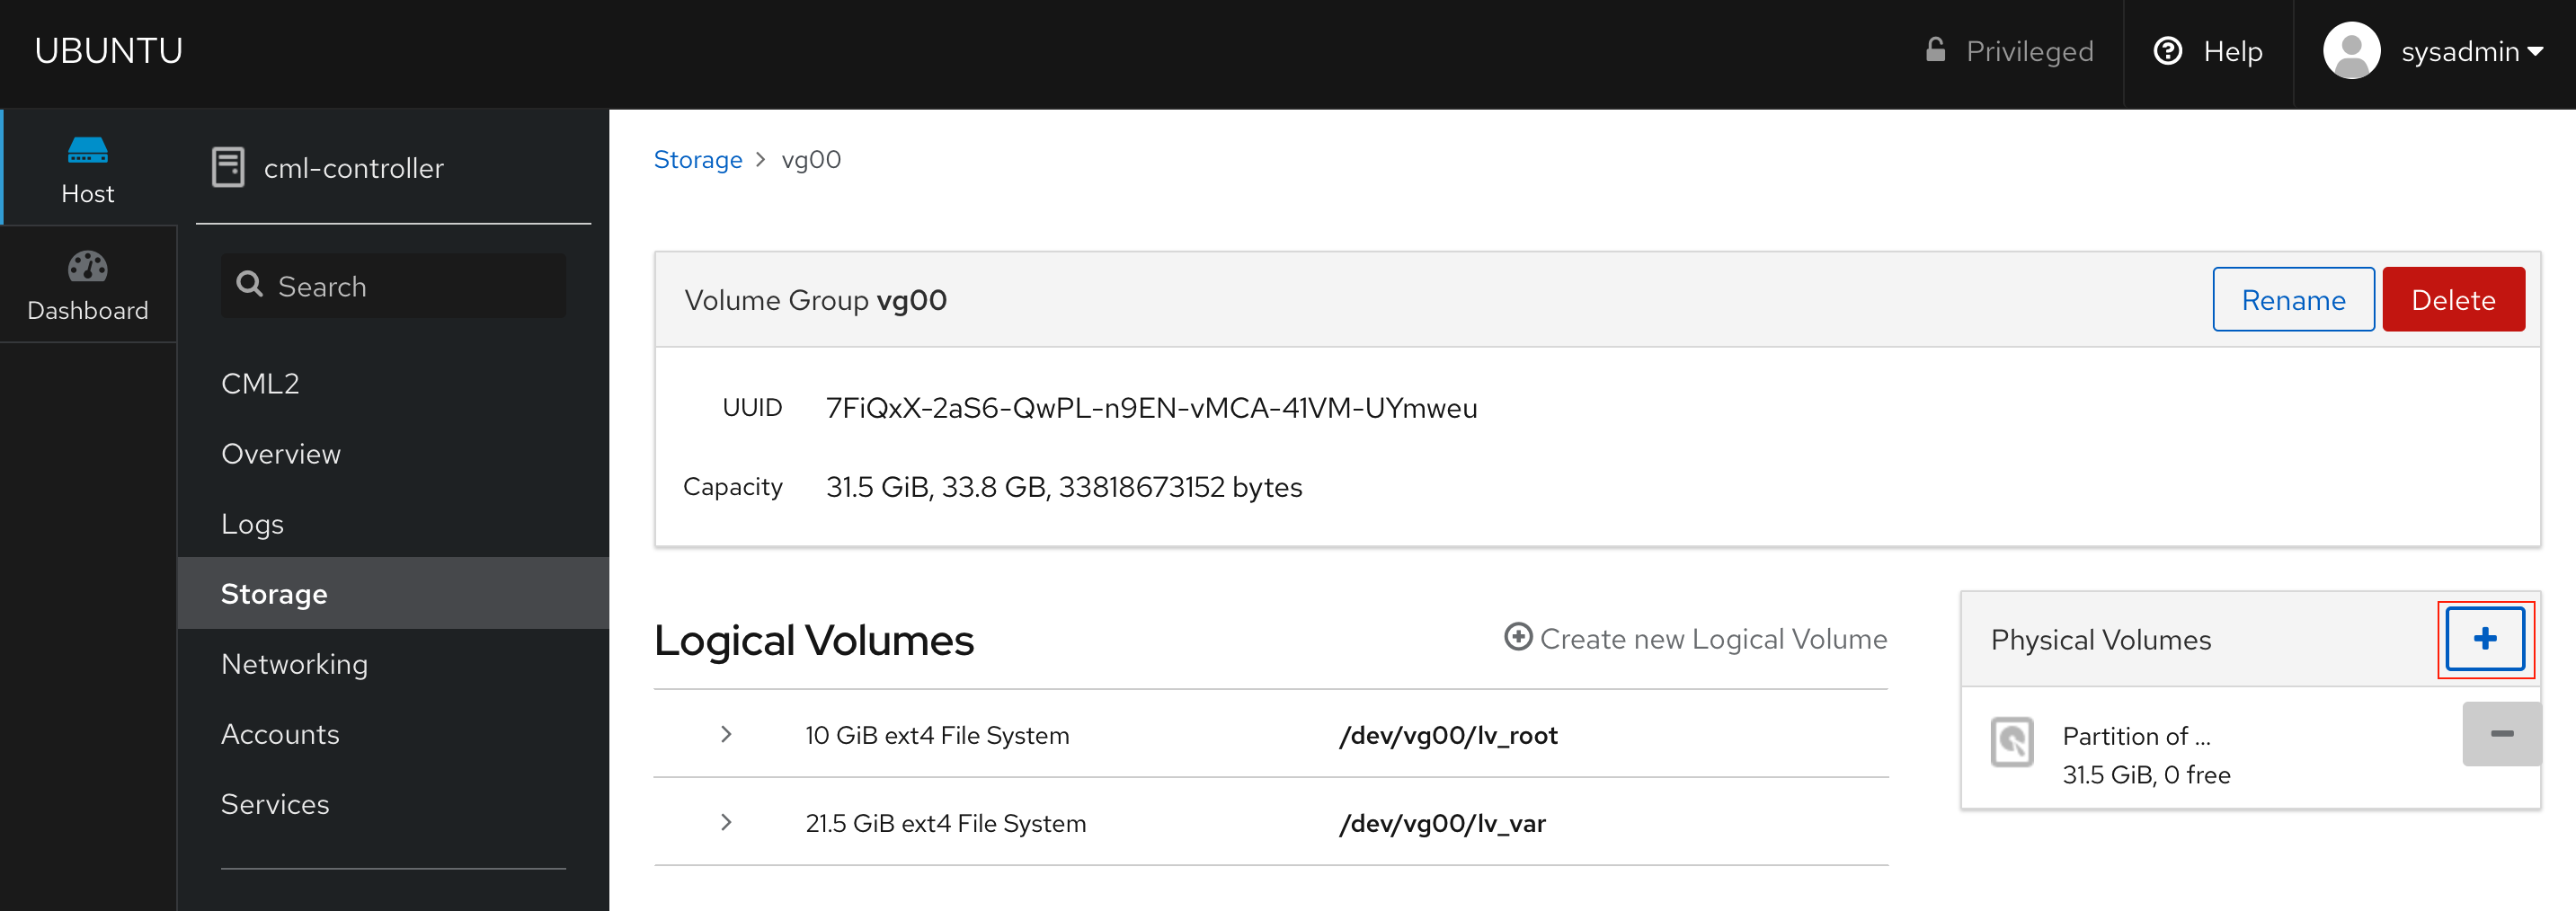
Click “+” button and the new window will appear.
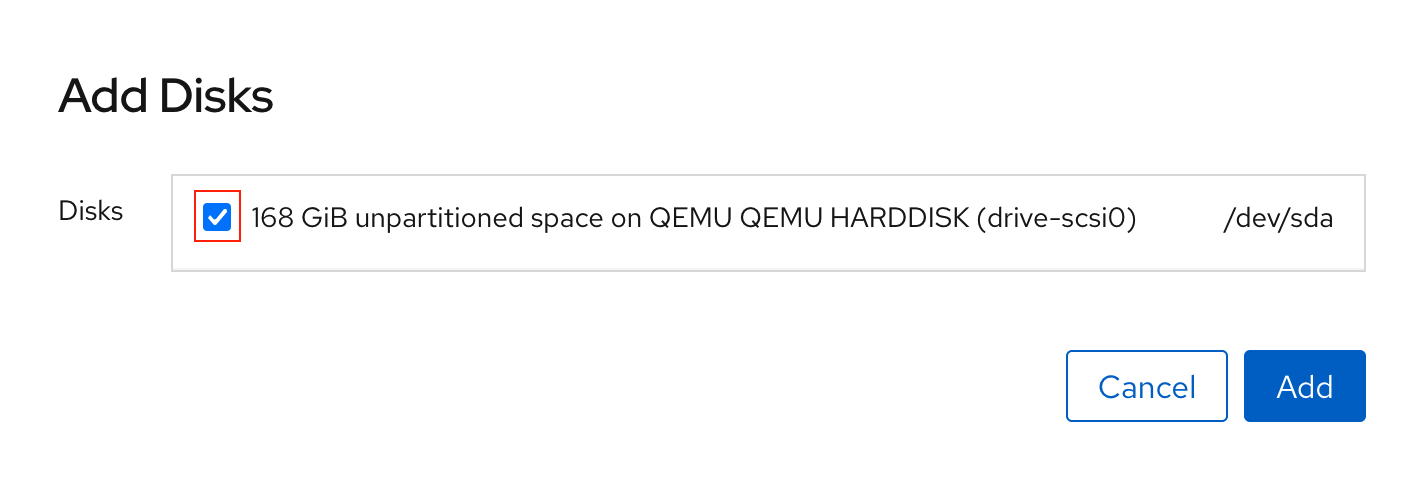
Select new disk space and click Add.
Unfortunately - You might experience an issue like I did, where assigning new space ends up with an error:
Error creating partition on /dev/sda: Failed add partition to device '/dev/sda' (Unable to satisfy all constraints on the partition.)
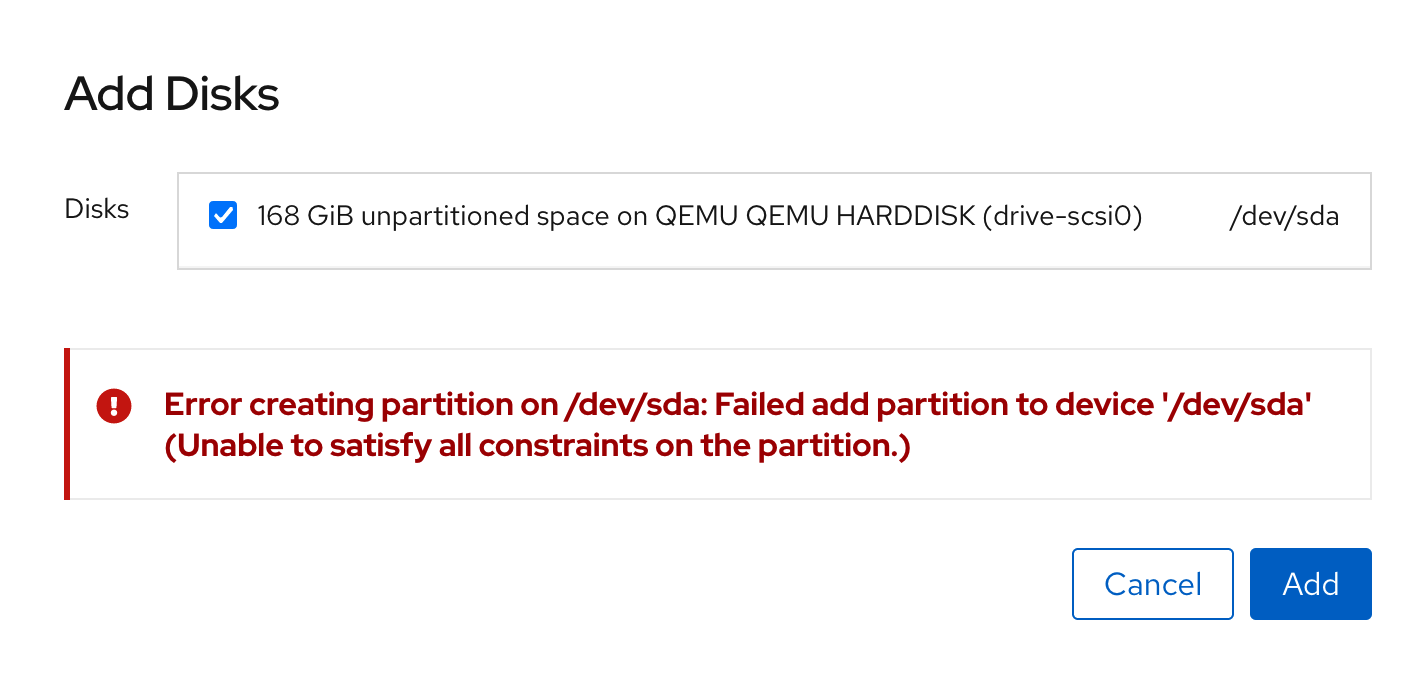
Don’t worry, I got you covered.
Answer to the question no. 10 in CML Troubleshooting Guide perfectly describes the steps that need to be done to fix the issue.
Let’s jump to the Terminal and execute commands described in the guide mentioned above to fix the issue.
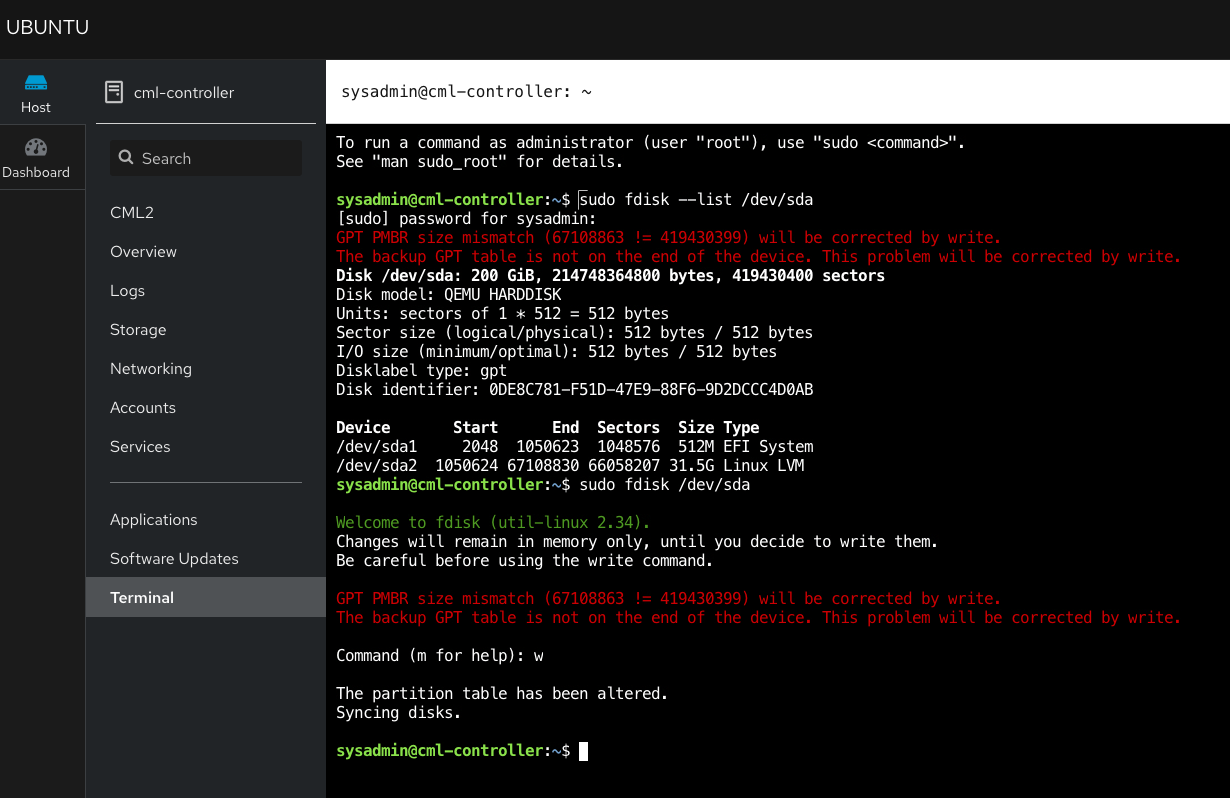
Now, navigate back to the Storage tab and try to add disk again using “+” sign.
This time capacity of the volume group should be extended with no issues.
The last step is to extend lv_var LVM. Click on lv_var and then “Grow” button to extend its size.
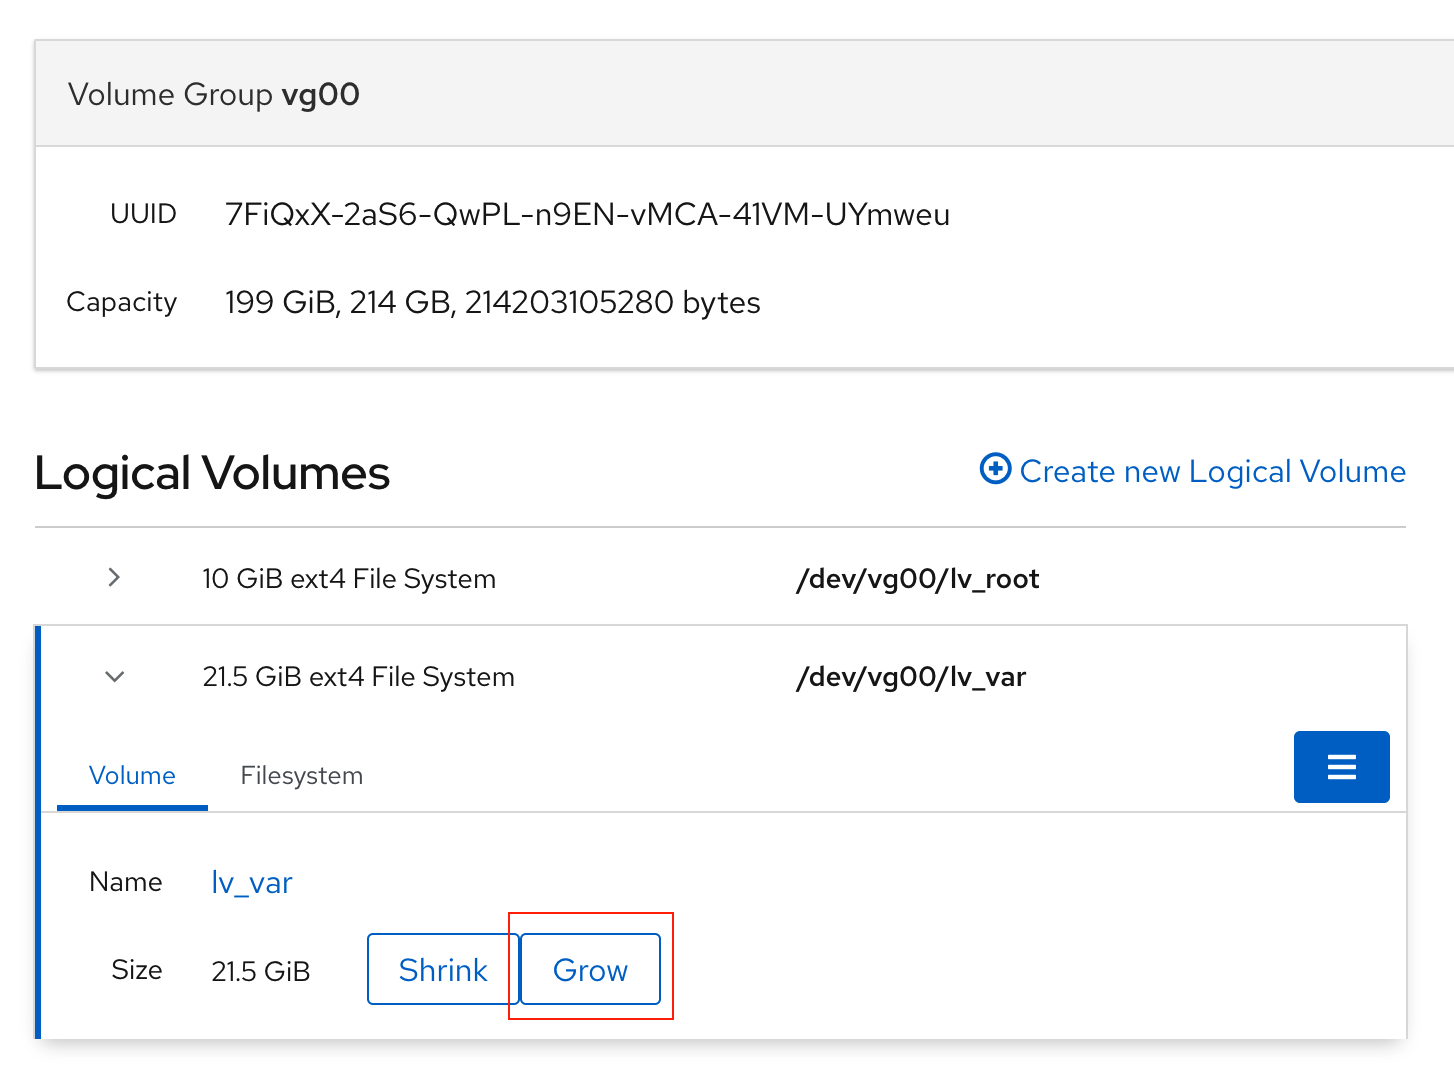
Success! :partying_face: :party_popper:
Running nodes on CML #
Once everything was set - I did a simple test to see if I could run some nodes on a CML deployed on Proxmox.
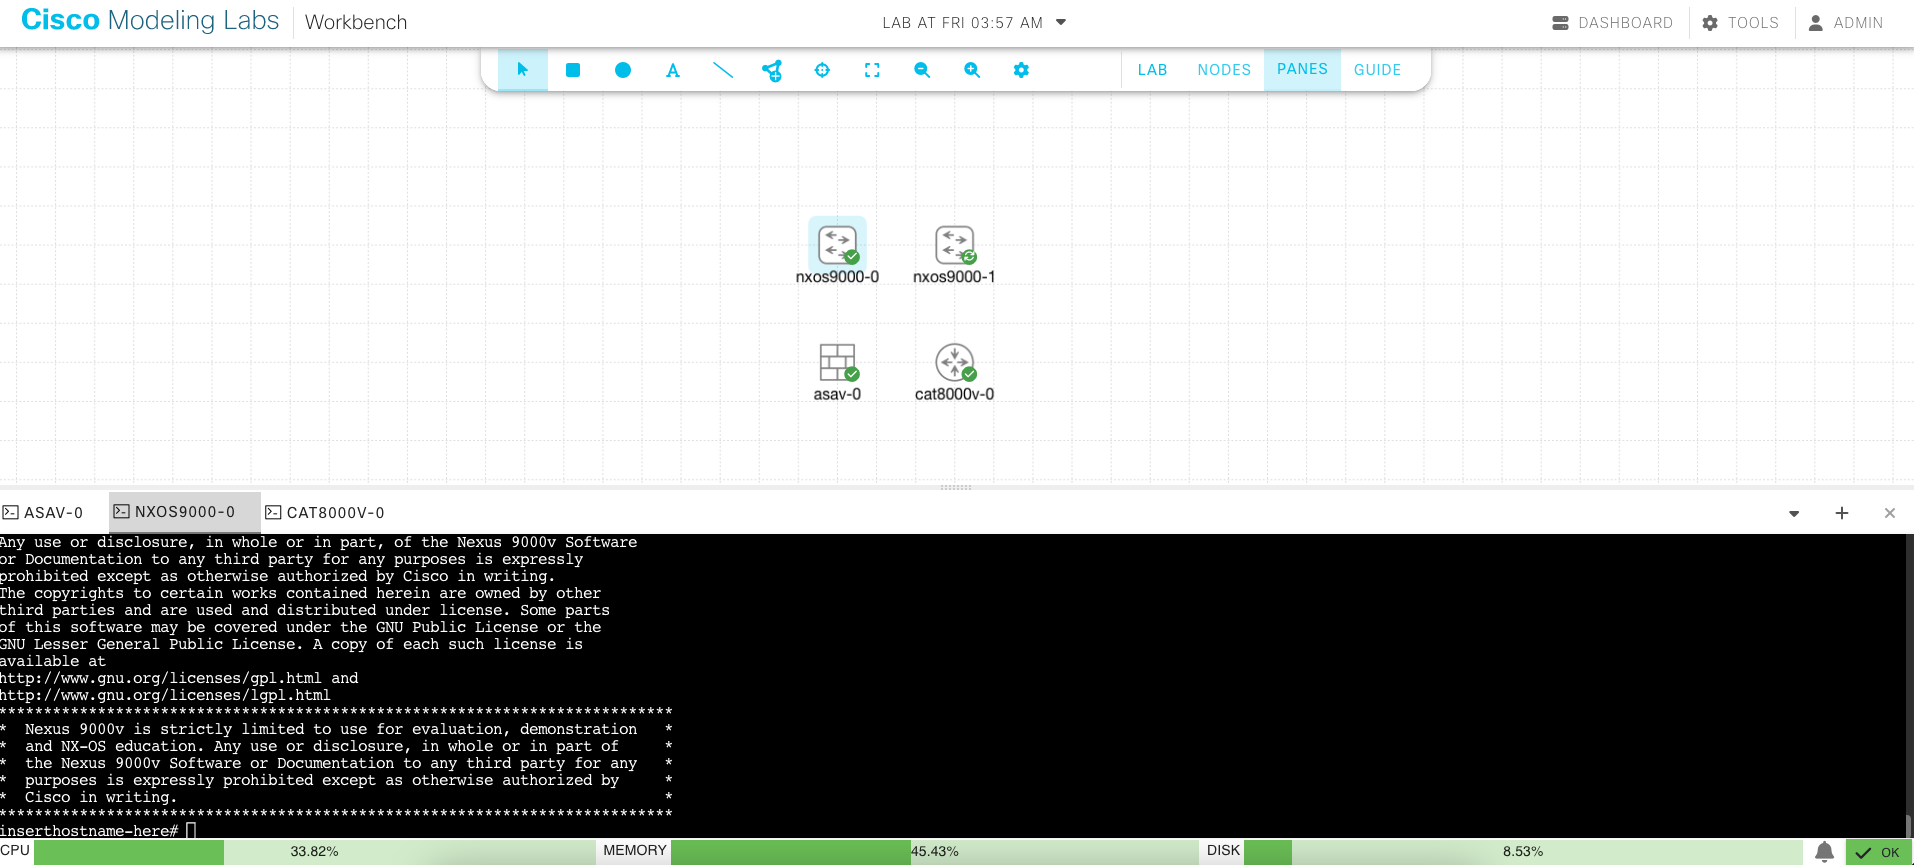
As you can see - NXOS and 8000V happily consumed my server resources and gave me access to their command line :grinning_face_with_smiling_eyes:
Summary #
Proxmox is not on a list of supported platforms you can run CML on, so support capabilities might be limited - please keep that in mind. I agreed with that risk because I had to spin up my home lab very quickly for my DevNet Expert studies.
You can still deploy CML to the public cloud like AWS, but my goal was to use the equipment I already have and to reduce the costs as much as possible - DevNet Expert is not a cheap project, and I didn’t want to be surprised by the cloud provider’s invoice.
I hope this post helped you to save time and money - now you don’t need to buy VMware license or deploy CML to the cloud if you have computing resources in your home lab - no unexpected invoices 💰
As always - thank you so much for your time, see you in the next blog posts! :saluting_face: