Intro #
DevNet Expert Candidate Workstation is a VM prepared by Cisco to allow DevNet Expert candidates to familiarize themselves with a toolset used in a real-life Lab Exam. The key fact is that this is ALMOST the same system that is used in a real exam, except few differences. It’s strongly recommended to work on this machine during your preparations so you can understand how everything works to be sure you will not be surprised on an exam day.
My Setup #
Issues with Windows #
Previously I was running my VM on a dedicated computer with Windows 10 installed using VMware Player so I could connect to my VM using RDP. Everything worked fine until Windows crashed itself. I couldn’t recover it, but thankfully I was able to get VMDK from the disk. My Windows instance was in terrible condition so I couldn’t even run it in a standard Safe Mode. I was able to run Windows in a Safe Mode with a CMD, so I copied a file to external storage. Whew… :relieved:
Computer as a Tier-1 Hypervisor #
I’ve decided to make my computer become a Tier-1 hypervisor. Resources on a machine are limited so I wanted to install lightweight tier-1 software so I could utilize my machine better and not rely on unstable Windows 10, where lots of resources were consumed for Windows features I don’t need. I also wanted to prevent being blocked from my study because of Windows which crashed after the update. Lessons learned.
I was looking for a free ESXi image, well known to me, but I was unpleasantly surprised by Broadcom…
As part of the transition of perpetual licensing to new subscription offerings, the VMware vSphere Hypervisor (Free Edition) has been marked as EOGA (End of General Availability). At this time, there is not an equivalent replacement product available.
ref: https://kb.vmware.com/s/article/2107518
Alright, no more using ESXi I was a big fan of. My dear friend (thanks A. :smiling_face_with_halo: ) reminded me about an open-source alternative to ESXI - Proxmox. I went to the setup process immediately - installation was smooth, with no issues, and creating and running VMs are really easy.
Let see how import process looked like.
Importing CWS to Proxmox VE #
Create a new VM for CWS #
Proxmox is a QEMU-based virtualization platform. With that being said, qcow2 needs to be used, but Cisco got you covered. On Devnet Expert Equipment and Software List you can download disk image in qcow2 format which is supported by Proxmox.
Once you’re ready - copy 2022-04-08_DevNetExpert_CWS_Example.qcow2 file you’ve downloaded to your Proxmox server using SCP.
% scp 2022-04-08_DevNetExpert_CWS_Example.qcow2 <username>@<proxmox ip>:.
Once copied, verify if the image is present in your home dir.
root@proxmox:~# ls -l *.qcow2
-rw-r--r-- 1 root root 15707799552 Feb 24 06:17 2022-04-08_DevNetExpert_CWS_Example.qcow2
Now you can create your VM in Proxmox GUI.
VM specs I used:
- Cores: 2
- RAM: 8192MB
- Network: No network device (by default Proxmox will use bridge for this VM)
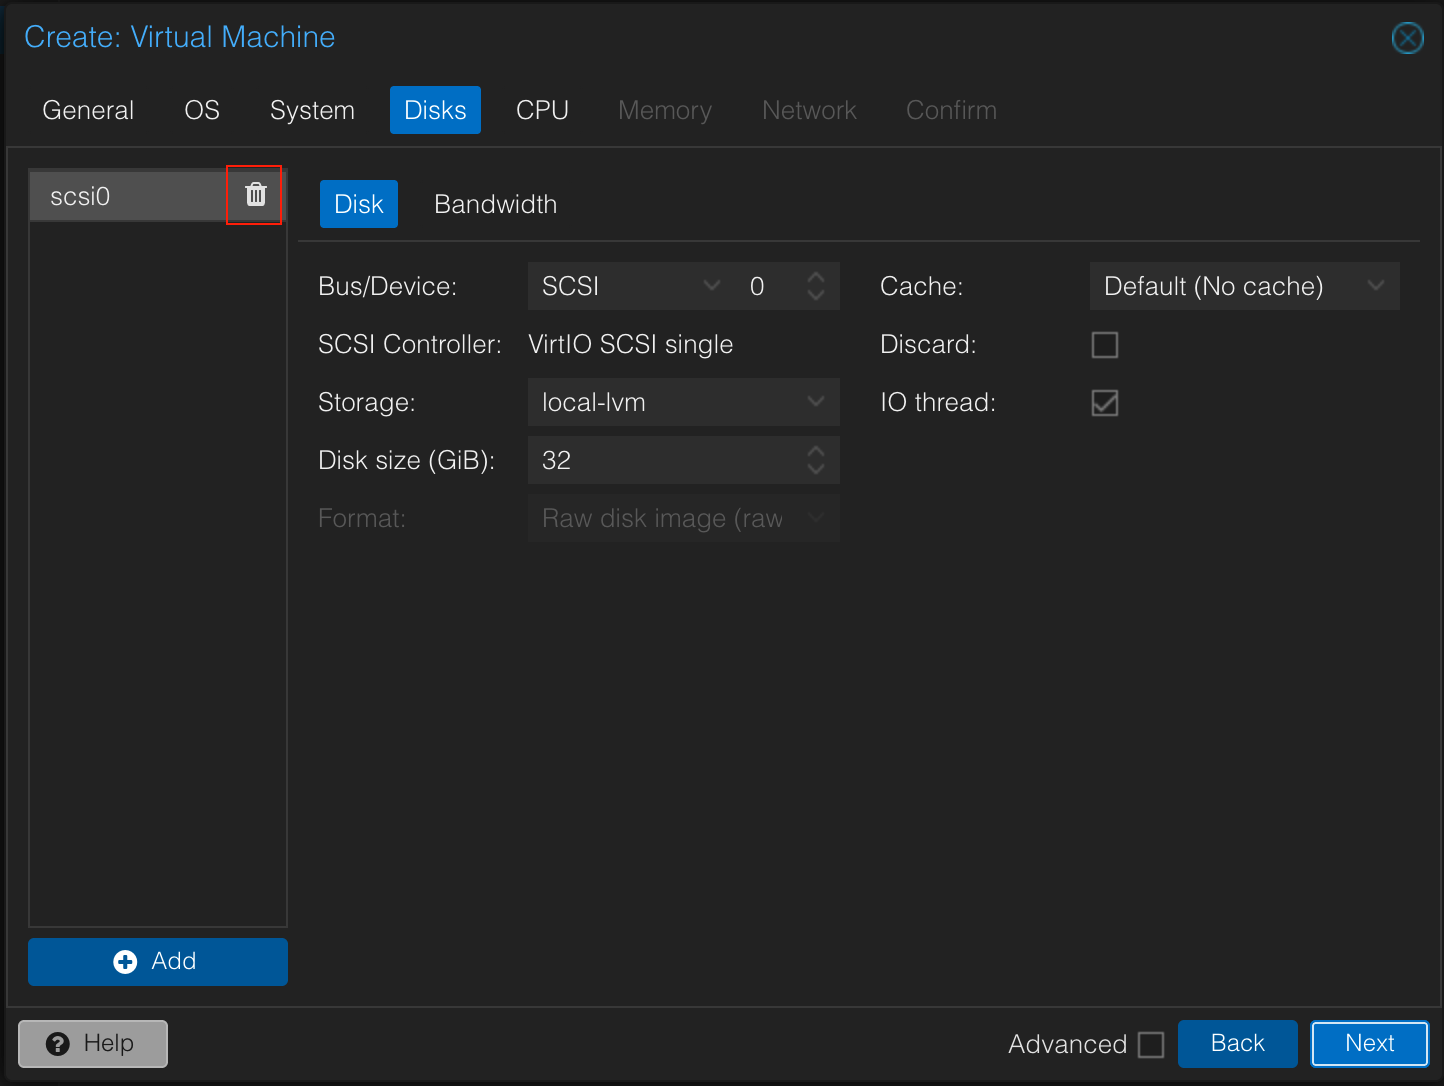
Ensure that on the “Disks” tab you removed the default “scsi0” disk - you don’t need to consume extra disk space for this, since you will import the disk downloaded in a previous step.
On a summary page, right before VM creation - pay attention to vmid - note it down - we will need that in a moment.
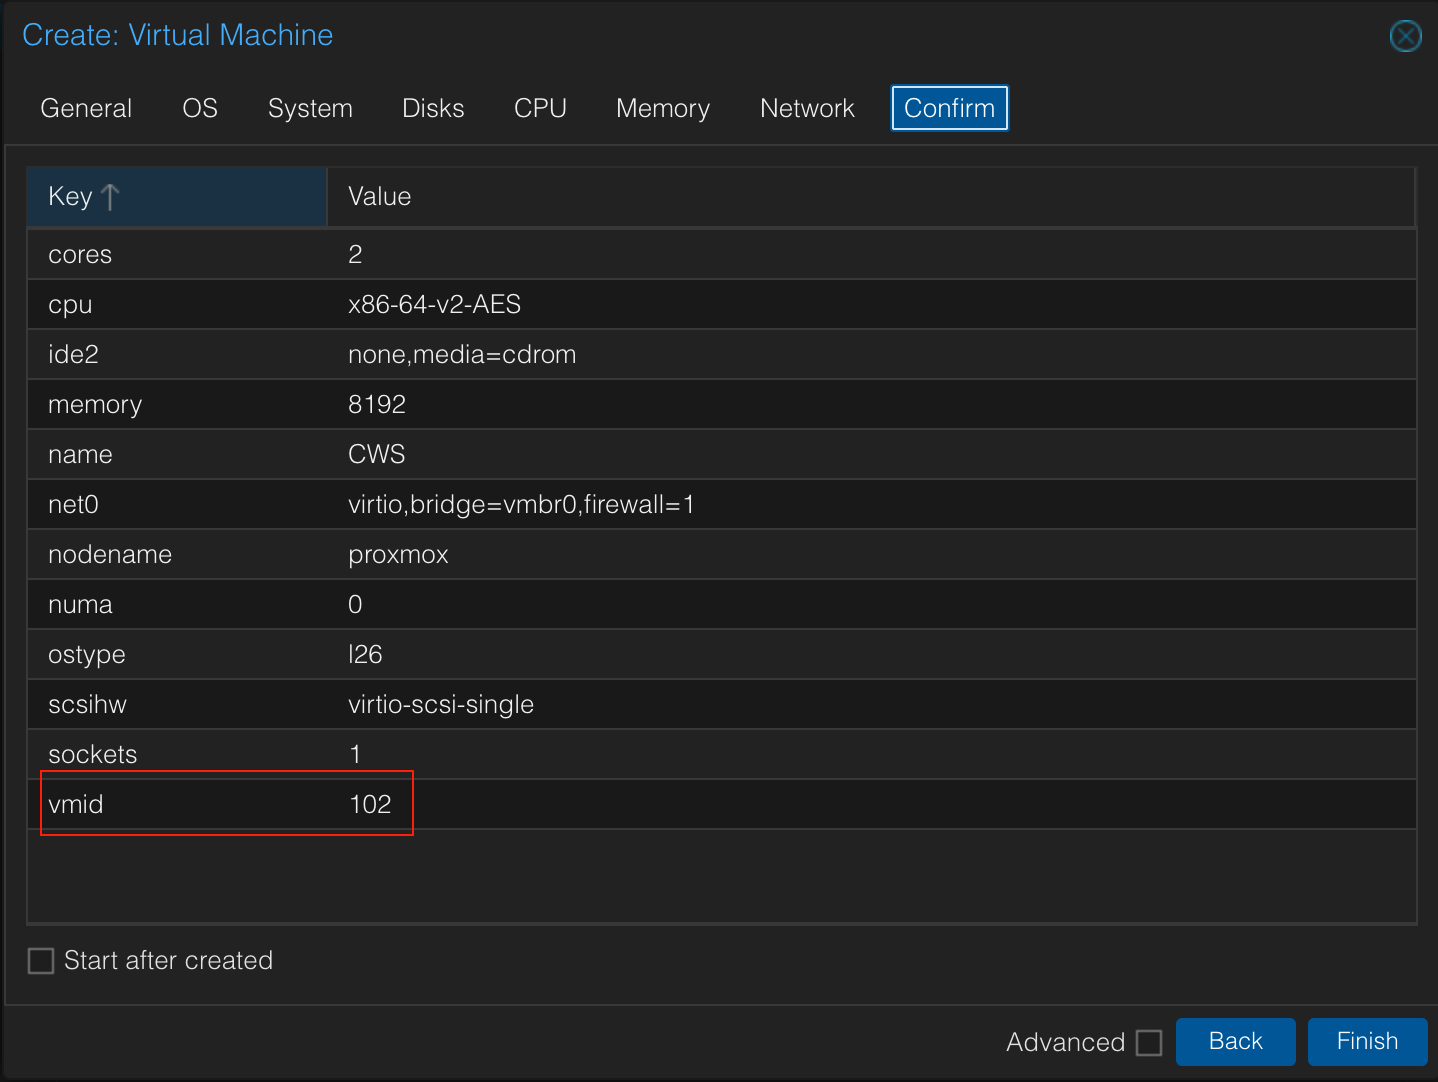
Once completed - do not power on your VM yet - we still need to import the already downloaded qcow2 disk.
Assign qcow2 disk to newly created VM #
Log in back to your Proxmox server using SSH and import the disk to the VM we created above.
qm importdisk <vmid> <qcow2_filename> local-lvm --format raw
With this command, you import the disk to the VM with a specific vmid that will be stored on “local-lvm” storage. Now let’s wait for this process to be finished and then execute rescan.
root@proxmox:~# qm importdisk 102 2022-04-08_DevNetExpert_CWS_Example.qcow2 local-lvm --format raw
importing disk '2022-04-08_DevNetExpert_CWS_Example.qcow2' to VM 102 ...
<output ommited>
transferred 50.0 GiB of 50.0 GiB (100.00%)
transferred 50.0 GiB of 50.0 GiB (100.00%)
Successfully imported disk as 'unused0:local-lvm:vm-102-disk-1'
root@proxmox:~# qm rescan
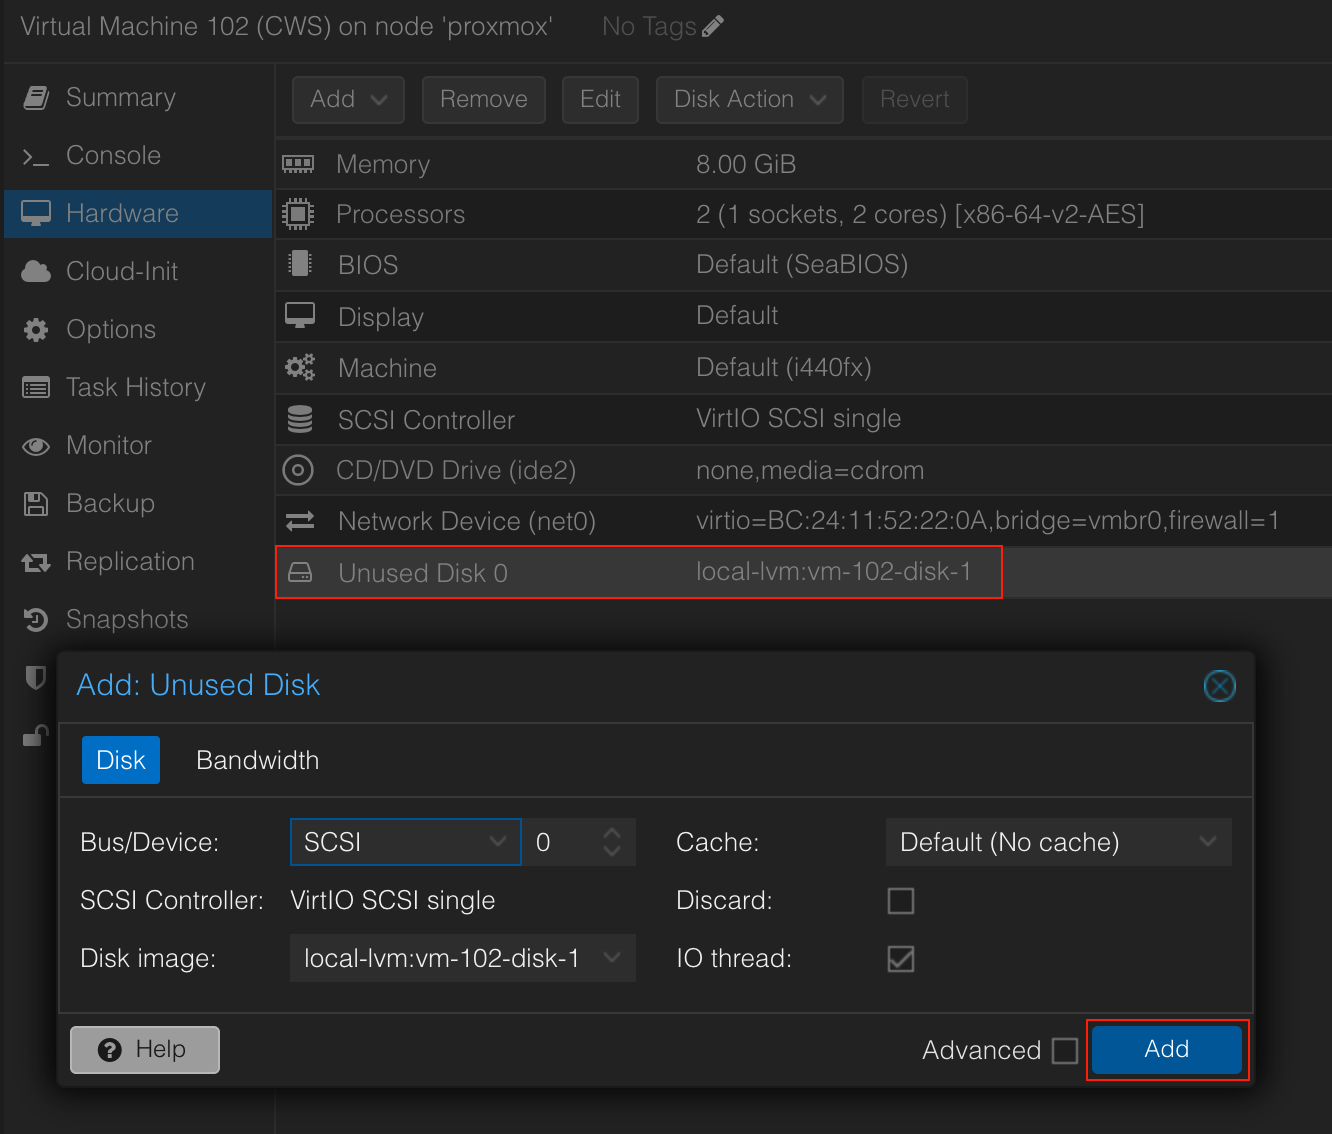
Once finished, in Proxmox GUI click on your VM and choose “Hardware”. At the bottom, you’ll see our disk that is not yet assigned to your VM. Double-click on this entry, retain default settings, and add disk to your VM.
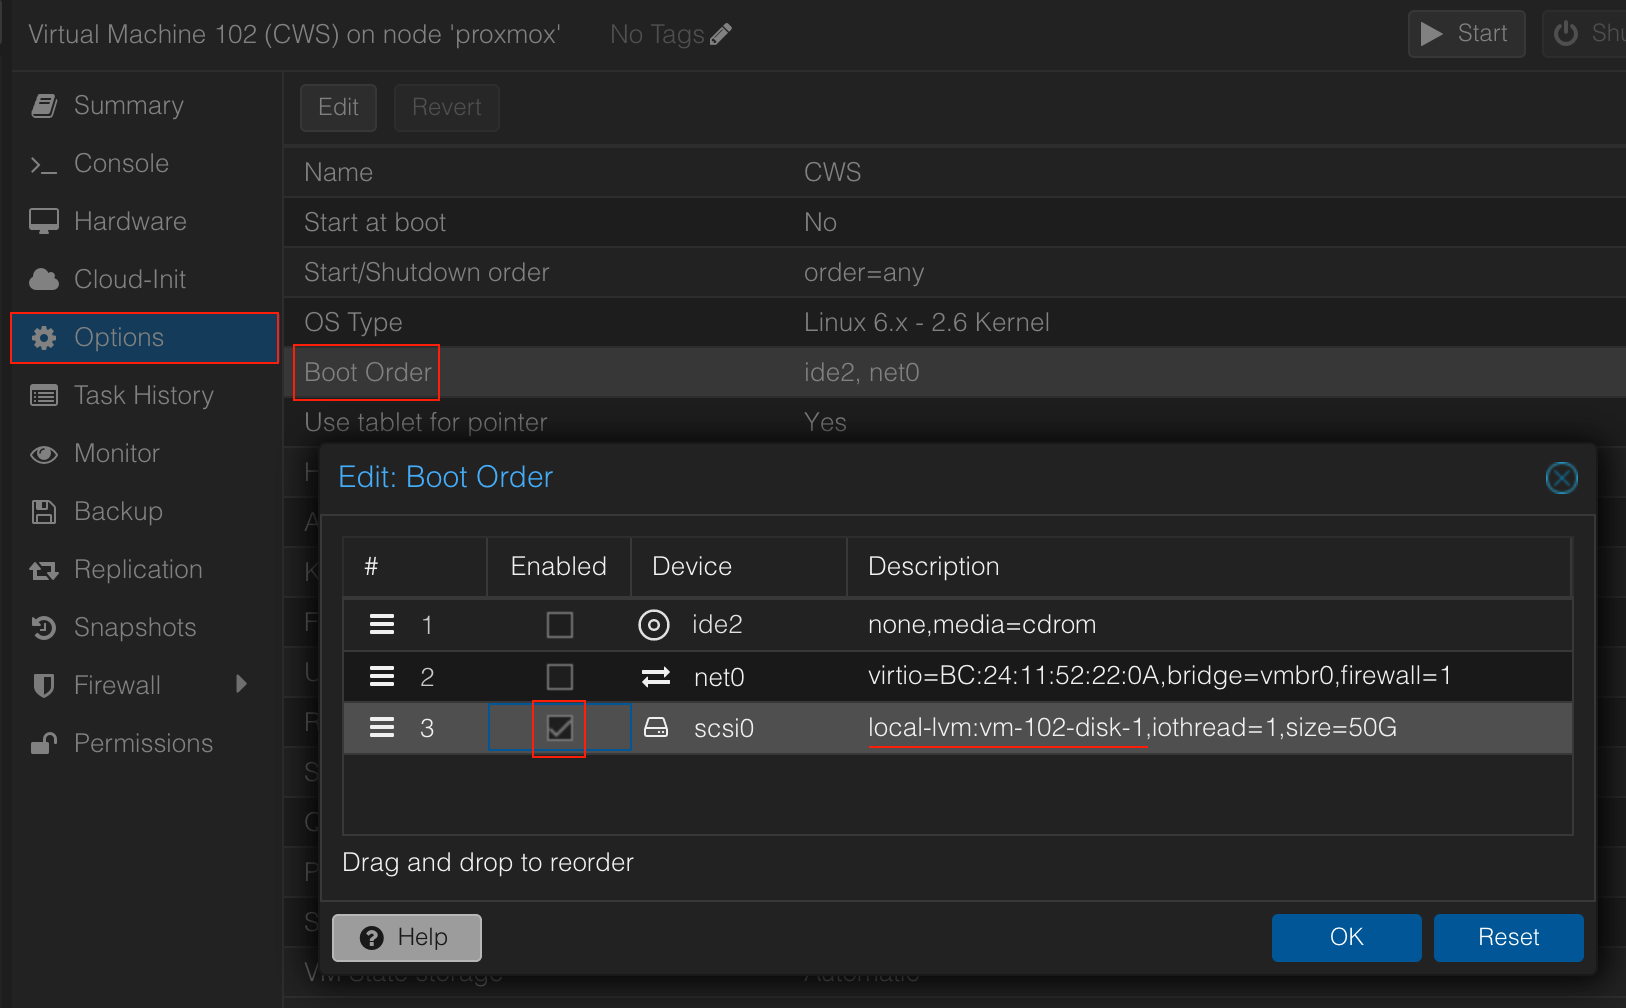
Disk is assigned to VM, but we need to tell Proxmox that from now on, this VM needs to be booted from a disk we just assigned. In “Option”, click on “Boot Order” and select “Edit” at the top. We don’t need to use CDROM and Network as a boot option so we can just disable it and enable “scsi0” where our disk is.
Now you are ready to start on VM. Once VM is selected, there is a “Start” button at the top. Go to the “Console” to see if your VM boots as expected.
Oh no! My VM is not working! There is no GUI, only a blinking underscore sign…
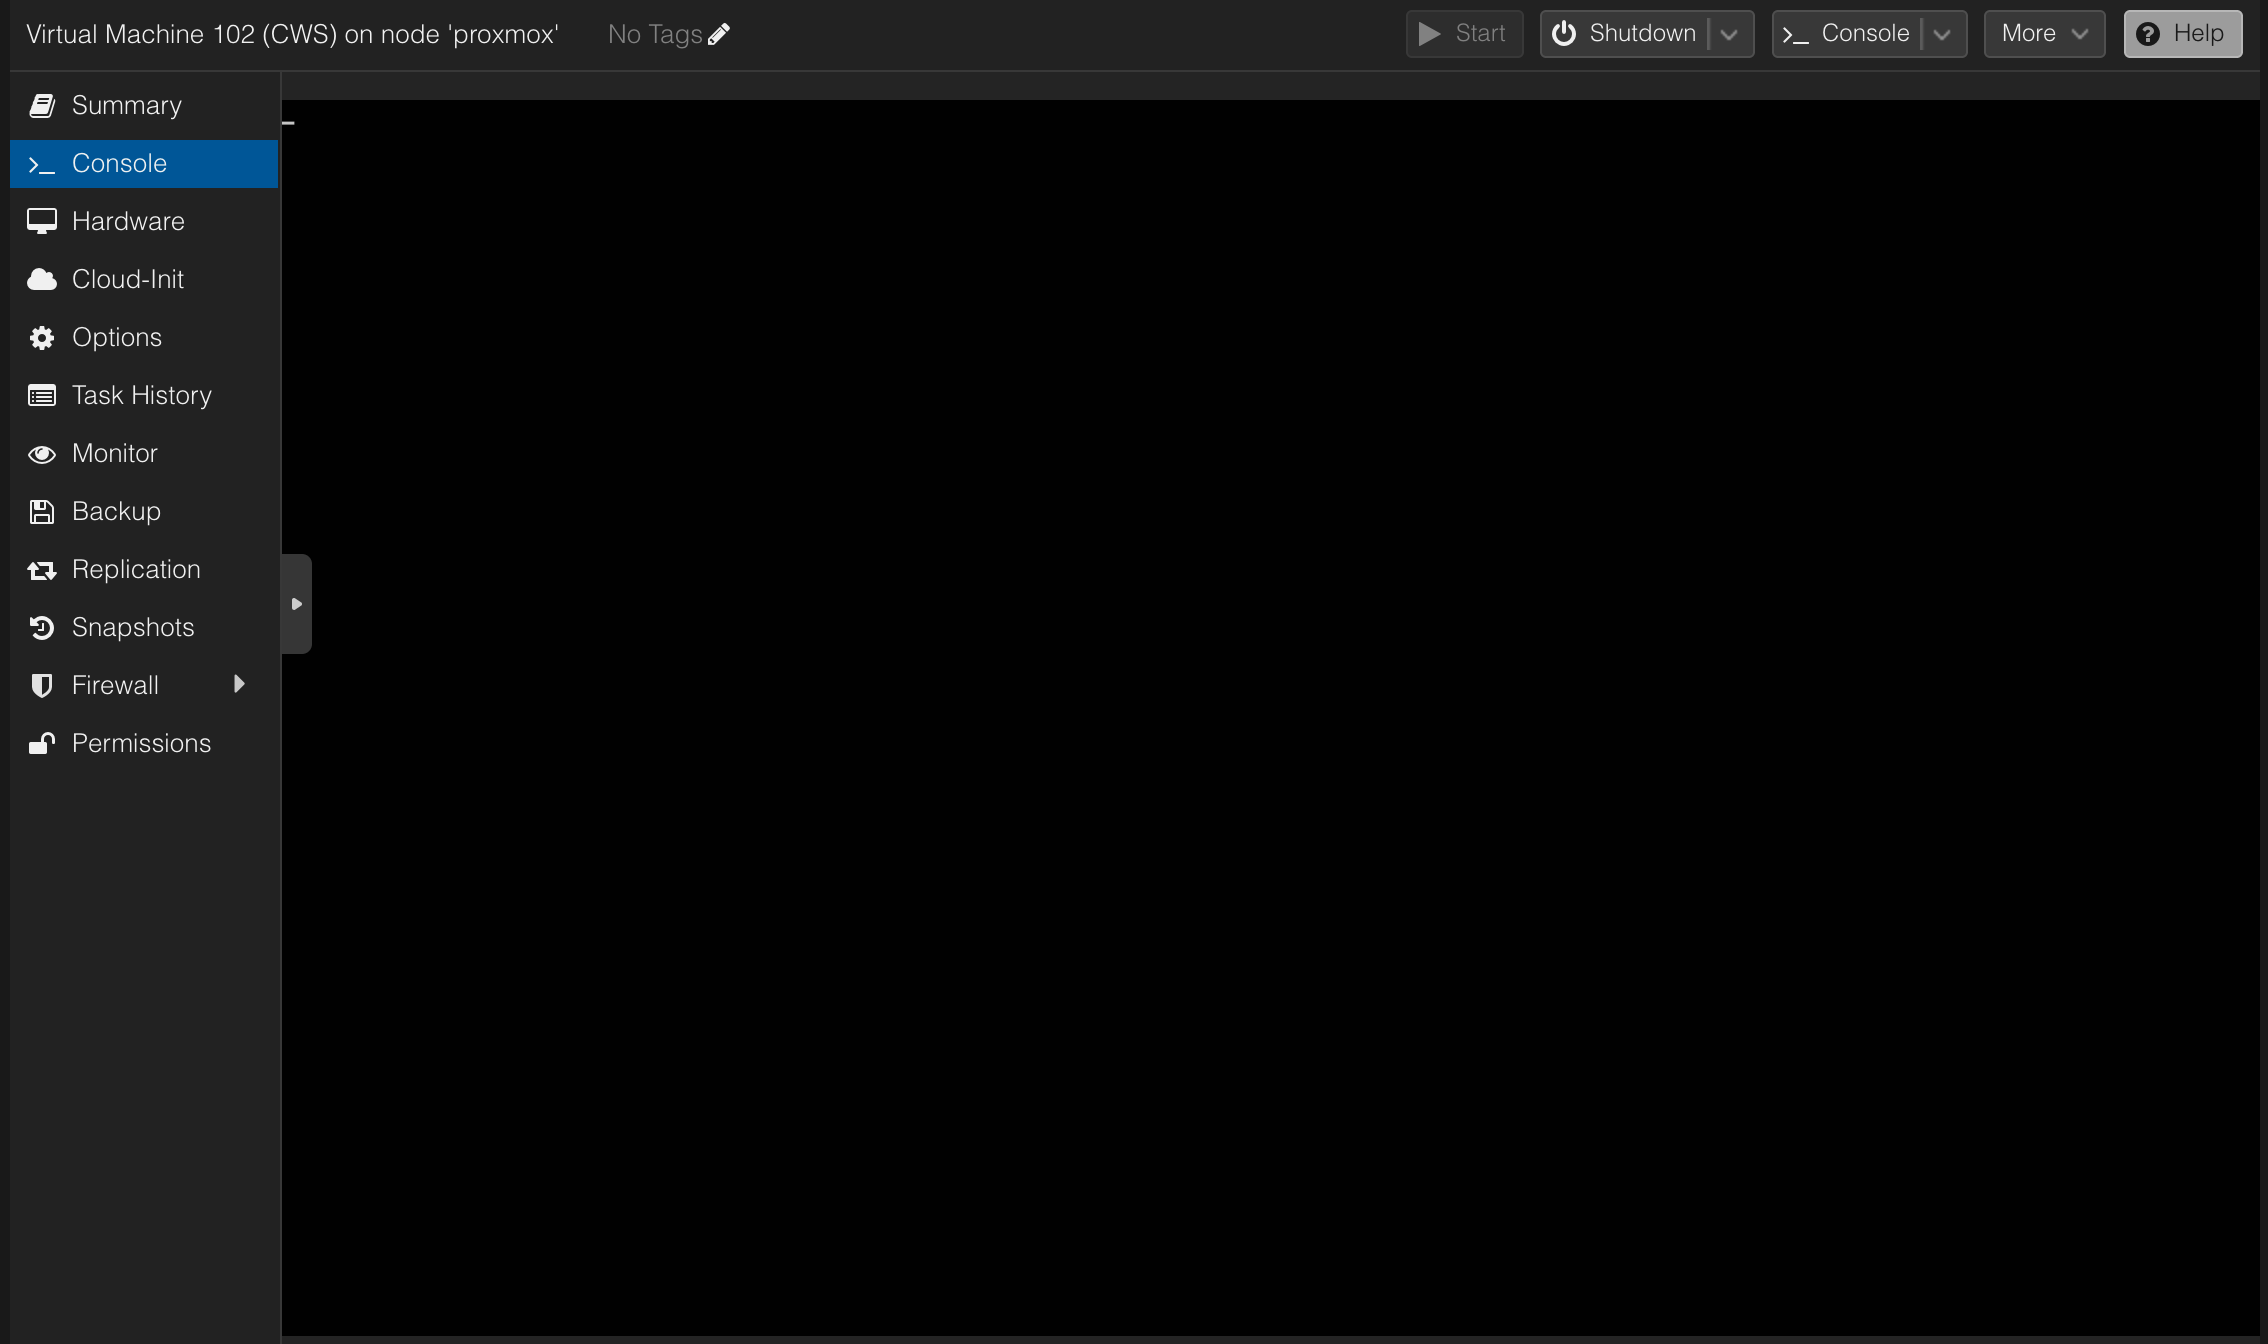
Problem with blinking underscore and no GUI displayed #
Don’t worry, I got you covered. This specific VM image has a problem with QEMU-emulated devices - drivers for some of the components couldn’t be loaded and this led to a problem with the X server on a Ubuntu so Gnome was not able to start. I assume the problem is that this VM originally was deployed to VMware hypervisor and Ubuntu was installed while being deployed to ESXi. Fun fact - pure Ubuntu which is installed from scratch in VM deployed on Proxmox works perfectly without making any changes.
Going back to our issue - the solution is very simple:
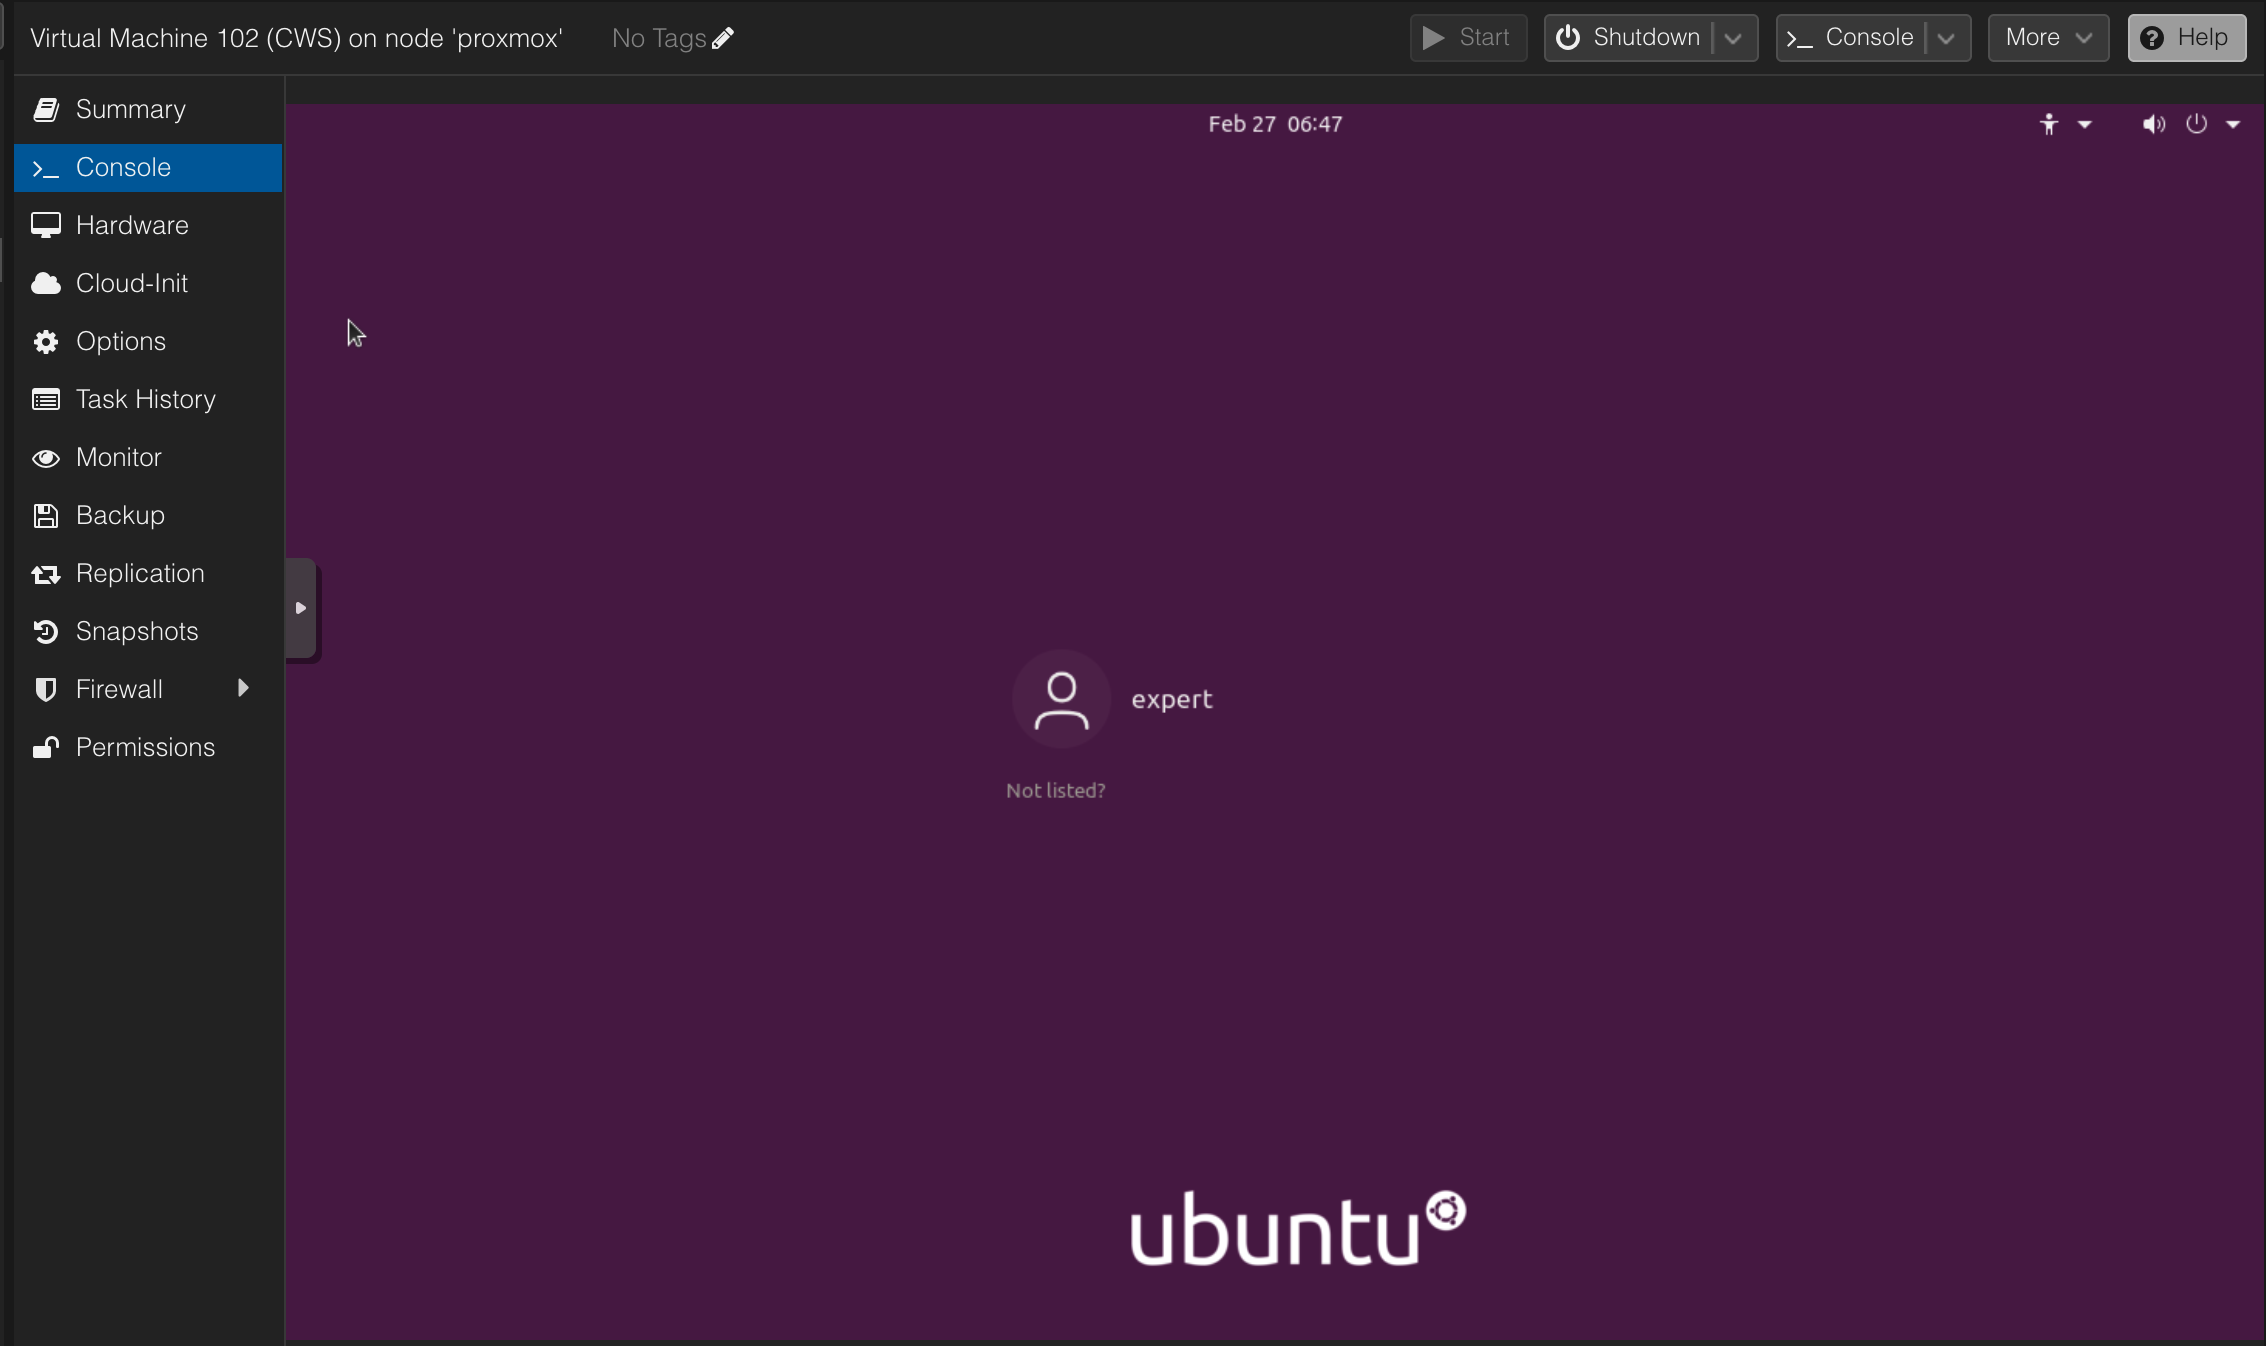
Stop your VM, and go to your VM’s Hardware settings and then change the Processor type from x86-64-v2-AES which is default, to host.

Start the VM again and verify if you can see GUI.
Cisco Modeling Labs #
If you use Cisco Modeling Labs - I got you covered. I’ve created a dedicated post that describes how to deploy Cisco Modeling Labs on Proxmox! You can find it under this link.
Summary #
The importing process was challenging for me. I spent lots of hours to figure out what was happening because the Linux system per se was working with no issues, but the GUI wasn’t. This exercise improved my Linux troubleshooting skills - in the future, similar cases I should be able to resolve quickly. journalctl -b is your best friend in cases like this.
I hope this article will help you to deploy CWS on Proxmox and will save you time so you can use it to study for DevNet Expert Lab Exam instead of going through logs for hours like me.
Thank you for reading this blog article. Happy labbing and good luck! :star_struck: